Why Mint Roots Need Control Before They Take Over Everything
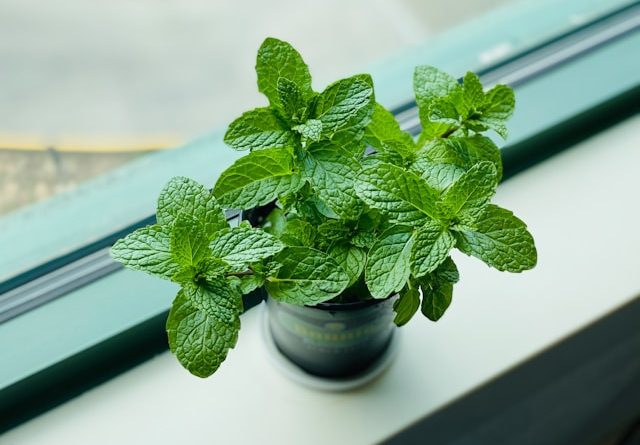
Photo by Eleanor Chen on Unsplash
If you’ve ever planted mint directly in the ground, chances are you learned a hard lesson the following year. Mint doesn’t just grow — it spreads, and then spreads some more, and then somehow shows up three meters away as if it teleported underground.
I say this with love, because mint is one of my favorite herbs. I grow several varieties — spearmint, peppermint, apple mint, Moroccan mint — and each one smells amazing, tastes incredible in tea, and grows like it’s trying to win a marathon. But mint doesn’t know when to stop. Its root system consists of fast-moving runners that send up new shoots anywhere they feel like it. If you let it roam freely, it can take over beds, pathways, and even choke out slower-growing vegetables.
After years of gardening, experimenting, and occasionally swearing at mint that escaped its “prison,” I’ve learned that root control isn’t optional — it’s necessary. The good news is that managing mint doesn’t have to be expensive, complicated, or stressful. With a little creativity and some cheap repurposed materials, you can enjoy mint without letting it conquer your whole garden.
Understanding How Mint Actually Spreads
Before we dive into the solutions, it helps to know why mint is such a root rebel.
Mint spreads through rhizomes, which are underground stems that grow horizontally. Every few centimeters, the rhizome sends up a new sprout. That sprout becomes a new plant. That plant grows more rhizomes. Those rhizomes make even more plants. You get the idea.
A single small mint seedling can eventually become a carpet of mint if it finds loose, moist soil. The plant isn’t being malicious — it’s just doing what mint does best. The problem is that most vegetables and herbs don’t grow this aggressively, so mint easily outcompetes them.
I once planted mint near my strawberries, thinking they’d be cute neighbors. A year later, the mint had turned into a dense wall of leaves, while the strawberries were waving tiny white flags asking for help. That experience taught me to never underestimate mint’s underground ambitions.
Method 1: Grow Mint in Containers (Even Inside a Garden Bed)
The simplest way to control mint roots is to never let them touch free soil. Growing mint in pots, buckets, or large containers keeps the rhizomes confined.
But here’s where many gardeners go wrong:
They put the pot on a soil surface, and mint roots sneak out through the drainage holes.
How to do it right
- Use a container at least 20–30 cm deep.
- Elevate it slightly using bricks or wood so roots can’t anchor into the ground.
- Or place it on a paved surface, gravel area, or sturdy tray.
If you still want the container inside a garden bed (for aesthetics or easy watering), bury the pot halfway. Just make sure you check the bottom occasionally to make sure roots haven’t poked out like escape artists.
I personally reuse old paint buckets, cheap plastic crates, or even damaged grow bags. As long as the container holds soil and drains well, mint will be happy. And more importantly — contained.
Method 2: Root Barriers Made from Repurposed Materials
If you want mint in the ground but still under control, root barriers are a budget-friendly option. You don’t need fancy commercial barriers — you can use things you already have lying around.
Over the years I’ve used:
- Broken plastic storage crates
- Old buckets with the bottom cut off
- Sections of PVC pipe
- Large food-grade containers from restaurants
- Pieces of roofing tiles
- Even cracked ceramic pots
How to set up a simple root barrier
- Dig a hole about 30–40 cm deep.
- Insert the container or barrier so it forms a ring around the mint.
- Keep at least 3–5 cm of the barrier above the soil surface.
- Backfill around it and plant mint inside the protected area.
The key is that 3–5 cm lip sticking out above the soil. Mint rhizomes will happily climb over a barrier if they can’t see it, but they usually won’t climb over one that’s exposed.
I’ve had a buried bucket with the bottom removed successfully contain mint for five years straight. Meanwhile, a barrier that I forgot to leave above the surface was breached within a season. Mint is clever like that.
Method 3: Regular Root Pruning — Easier Than It Sounds
You prune the leaves and stems of your plants, right? Well, root pruning is the same idea. You’re just cutting back the underground runners before they take off.
This method is perfect if you:
- Grow mint in raised beds
- Let mint grow in semi-controlled zones
- Don’t mind a little extra maintenance
How to prune mint roots
- Once or twice a year, dig a shallow trench (10–15 cm deep) around the mint clump.
- Cut any wandering rhizomes with a sharp spade.
- Remove the stray chunks of root so they don’t re-root.
It sounds like work, but it’s actually fast. I use a half-moon edging tool and simply slice along the perimeter. The rhizomes snap cleanly and the mint stays in its corner.
Root pruning also rejuvenates the plant, making the main clump bushier and more productive. It’s basically giving your mint a “haircut” underground.
Method 4: Growing Mint in Bottomless Raised Beds or Tubs
This is a hybrid method that’s great if you want a bigger mint patch but still under control.
Just take a bottomless container — a broken bin, old bathtub, large wooden crate, or even a rusty metal trough — and set it onto your soil. Fill with compost, plant mint, and you have an above-ground “fenced” root zone.
Mint roots will try to dig down, of course, but they have a vertical wall blocking lateral movement. As long as the walls rise above the soil surface, mint has a hard time escaping.
I once used an old washing machine drum (after removing all sharp parts). It looked ridiculous but worked perfectly. And it drained like a dream.
Choosing the Best Method for Your Space and Style
Every garden is different, and every gardener has their own approach. The nice thing about mint is that it doesn’t care where it grows — it just wants to grow. That means you can experiment without needing fancy tools or expensive systems.
Here’s how I think about choosing a method:
- If I want mint near the kitchen door: small containers work best.
- If I want a large mint patch: I use bottomless barrels or big root barriers.
- If the garden is already crowded: root pruning keeps mint polite.
- If I’m low on time: a deep pot on a paved area is the easiest solution.
Mint is extremely forgiving. As long as it gets moisture and partial sun, it will thrive even in reused soil, recycled containers, and old compost. This makes it the perfect herb for budget-friendly gardening experiments.
Why You Shouldn’t Let Mint Loose in Free Soil
Let me be brutally honest here:
Planting mint freely in open soil is like giving a toddler a tub of paint and saying, “I trust you.”
You may think you’ll keep an eye on it, but life happens. You get busy. The garden gets overgrown. Then suddenly, mint is everywhere and you’re on your knees yanking out roots that seem endless.
Here’s what usually happens when mint takes over:
- It chokes out slower herbs like oregano, sage, and basil.
- It competes with leafy greens for nutrients and space.
- It spreads into walkways, gravel, borders, and even cracks in walls.
- It keeps returning years after you think you removed it.
Once mint gets established, removing every last rhizome borderlines impossible. Even a tiny leftover piece can sprout a whole new patch. That’s why prevention is so much easier than cleanup.
I’ve dug out mint invasions that required full shovel work, sifted soil, and selective flame weeding (don’t ask). And even then, the mint came back like it owned the place. Now I treat mint like the wonderful but unruly herb it is — freely allowed to thrive, but only where I decide.
Embrace Experimentation and Have Fun with It
Root control sounds serious, but honestly, it can be fun. You get to build things, repurpose odd objects, and try new methods each season. Some of my best mint-growing successes came from random experiments, like:
- Using a cracked aquarium as a mint barrier
- Planting mint in a stack of old tires
- Filling a broken wooden drawer with soil and herbs
- Growing mint in reused mushroom containers
- Using leftover roof tiles to form a circle wall
Mint doesn’t care about aesthetics. It cares about moisture and space. That means you can focus on practical solutions and creativity instead of expensive materials.
The goal isn’t perfection — it’s control. Try different methods until you find the one that fits your space, budget, and gardening style.
Mint Is a Treasure, But Needs Boundaries
Mint is one of those herbs that every grower should have, but with respect and boundaries. Its roots are powerful, persistent, and always looking for a new adventure. Without control, mint can overwhelm a garden. With control, it becomes one of the easiest and most satisfying herbs to grow.
Whether you use containers, root barriers, bottomless tubs, or regular pruning, you can keep mint healthy and productive without letting it dominate your soil. And you don’t need to spend much money — most solutions can be created from things you already have.
So go ahead and plant mint. Enjoy homemade tea, fresh mojitos, scented leaves, and beautiful green growth. Just give it a space where it can thrive without taking over yours.