Basics of growing microgreens at home
Photo by Devi Puspita Amartha Yahya on Unsplash
Microgreens have become one of my favorite things to grow, not just because they’re tasty and healthy, but because they’re simple and surprisingly fun. They don’t need a garden, a fancy grow tent, or expensive supplies. In fact, some of my best microgreen harvests came from repurposed food containers and old baking trays. You can grow them on a windowsill, a shelf, or even a corner of your kitchen counter.
If you’ve ever wondered whether microgreens are worth the effort, I can tell you that they absolutely are. They grow fast—usually in 7 to 14 days—so you get the satisfaction of a quick harvest. They’re also perfect for experimenting since every plant tastes slightly different in its young form. Peas are sweet, radishes are spicy, sunflowers are nutty, and basil microgreens smell like a tiny garden in your hand.
Here are the basics of growing microgreens on a budget, plus a few personal tips from years of growing them at home using whatever containers I had lying around.
Getting started with simple supplies
One of the biggest myths about microgreens is that you need special trays and professional gear. You don’t. You just need shallow containers, some growing medium, seeds, and a bit of light. That’s it.
Many people buy stackable trays, which are great, but I’ve grown trays and trays of microgreens in old takeout boxes, fruit punnets, and even cut-up milk cartons. As long as the container is shallow (around 3–6 cm deep) and has drainage holes or some way for excess water to escape, it will work.
For growing medium, you can use:
- potting soil
- coconut coir
- seed-starting mix
- even a folded paper towel for some smaller seeds
Soil gives the best results, but coir keeps everything clean and is easy to handle indoors. I reuse trays all the time, but I avoid reusing soil because microgreens grow so densely that old soil can harbor mold or disease.
When it comes to seeds, buy them from a reliable source. You can use regular garden seeds, but microgreen-specific seeds are usually tested for better germination. They cost a bit more, but you need only small amounts for each tray.
Lastly, light. Microgreens don’t need bright grow lights, but they do need enough light to stay green and upright. A sunny windowsill works for many varieties. If your home doesn’t get much direct sun, a small LED shop light is enough. I’ve used an old under-cabinet kitchen light before, and it worked just fine.
How to plant microgreens step by step
Planting microgreens is much easier than planting a full garden. You’re not worrying about spacing, transplanting, or long-term care. Everything happens quickly.
Fill your tray with your growing medium, level it gently, and moisten it until it’s damp but not muddy. Then sprinkle the seeds evenly across the surface. Microgreens grow thick, so don’t be shy—covering the surface with seeds is normal.
Some seeds need to be covered with a thin layer of soil (like basil or broccoli), while others should be left on the surface (like radish, peas, and sunflower). Check the usual instructions, but don’t stress too much. Microgreens are forgiving, and even mistakes usually turn out edible.
After sowing, mist the seeds with water. Then comes an important step: the blackout period. This means covering the tray with something (like another empty tray or a piece of cardboard) to keep the seeds in the dark for a few days. This encourages strong germination and makes the stems stretch a bit, which actually helps when harvesting.
For most varieties:
- Radish: blackout 2–3 days
- Peas: blackout 2–4 days
- Sunflowers: blackout 2–3 days
- Basil: blackout 4–5 days
- Broccoli: blackout 2–3 days
After the blackout period, place the tray in the light. Within a few hours you’ll see the tiny seedlings reaching upward, straightening themselves like they’re waking up.
Water gently whenever the soil feels dry. I prefer bottom watering—pouring water into a second tray and placing the grow tray inside—because it prevents mold and keeps the microgreens clean. But if you’re using improvised containers without good drainage, then misting from above is perfectly fine. I’ve done it often and never had issues as long as I didn’t drown the seedlings.
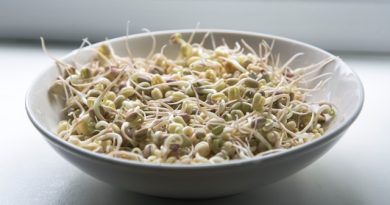
Harvesting and enjoying your microgreens
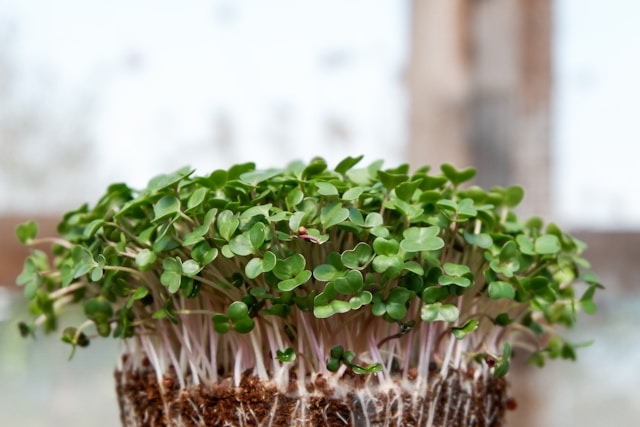
Harvesting is the most satisfying part because it comes so fast. Some varieties are ready in just a week. A good rule of thumb is to harvest when the microgreens have developed their first set of true leaves, which usually appear after the small, round cotyledon leaves.
To harvest, simply cut the stems above the soil with clean scissors. Rinse gently, and they’re ready to use.
Flavor is where microgreens shine:
- Radish microgreens are spicy, almost like a concentrated radish.
- Sunflower microgreens taste nutty and crunchy—my kids snack on them straight from the tray.
- Pea shoots are sweet and tender.
- Broccoli microgreens are mild and packed with nutrients.
- Basil microgreens smell incredible and elevate any dish.
The nice thing about microgreens is that you don’t have to grow big trays. You can grow tiny batches of different varieties and mix and match flavors depending on what you’re cooking that week.
I sometimes grow radish and sunflower side by side because they give such a nice contrast—spicy and crunchy together. It’s like having your own custom salad mix.
If you want to save money, keep a small rotation going:
- start a new tray every few days
- reuse containers
- buy seeds in bulk
Before you know it, you’ll have fresh, homegrown greens every week for the price of a few cups of soil and a handful of seeds.
Tips and personal tricks for success
Over the years, I’ve learned a few small tricks that make growing microgreens easier and more enjoyable, especially when using simple or repurposed equipment.
Don’t overwater.
This is the biggest mistake beginners make. Microgreens don’t need much water. Wet soil leads to mold, especially indoors. When in doubt, water less.
Give them enough airflow.
If your home is stuffy or humid, point a small fan at the trays for a few minutes a day. I often just crack a window. Good airflow keeps everything fresh.
Try different seeds.
Some seeds behave differently as microgreens than they do as full plants. For example, cabbage makes delicate, mild microgreens even though the full plant is tough and leafy.
Label your trays.
I always think I’ll remember what I planted… and then three days later I don’t. A piece of masking tape fixes that.
Don’t throw away mistakes.
Microgreens that grow a bit unevenly or look thin are still perfectly edible. The whole point of experimenting is learning what works in your home.
Reuse containers whenever you can.
Deep containers waste soil. Shallow containers work best. I wash and reuse plastic containers until they fall apart. It saves money and works just as well as expensive trays.
One of my favorite repurposed setups was an old wooden wine crate lined with a plastic trash bag. I poked a few holes in the bottom, filled it with soil, and grew sunflower microgreens all winter. They came out perfect.
Microgreens are the easiest way to start growing your own food
Microgreens are one of the simplest, fastest, and most rewarding ways to grow fresh food at home. You don’t need a garden. You don’t need sunshine all day long. You don’t need special tools. With a few seeds and some creativity, anyone can grow them—even in the smallest apartment.
They’re perfect for beginners, but also endlessly interesting for experienced growers who like experimenting with flavors, colors, and textures.
If you’re looking for a simple project that gives you tasty results in just a week or two, microgreens are the way to go. Start with radish or sunflower, then try peas, broccoli, mustard, or any herb you love. Before long, you’ll have a regular routine and plenty of fresh greens to enjoy.